
A lack of practice doesn’t hold back most typists who plateau at 35 to 45 WPM — they’re held back by finger placement they never got right in the first place. Every finger on your hands has a job on the keyboard, and that job starts and ends at the home row. If your fingers wander, so does your accuracy, and no amount of speed drilling fixes a habit that was wrong from day one.
This guide covers the complete finger placement system: the home row chart for both hands, thumb and number-pad positioning, the mistakes that quietly cap your speed, how placement changes on laptops and government exam typing software, and a 7-day plan to make it automatic. If you’re just starting out, pair this with our Touch Typing Guide for Beginners for the full learning path.
Which Fingers Type Z, X, C, V, B, N and M?
On the bottom row, your left pinky types Z, your left ring finger types X, your left middle finger types C, and your left index finger types both V and B. Your right index finger types both N and M.
Each finger reaches down one row from its home row key and then returns to it. The two index fingers cover two keys each, which is why V/B and N/M are the most common spots for mix-ups.
| Key | Finger | Home row key it reaches from |
|---|---|---|
| Z | Left pinky | A |
| X | Left ring | S |
| C | Left middle | D |
| V | Left index | F |
| B | Left index (stretch right) | F |
| N | Right index (stretch left) | J |
| M | Right index | J |
| , | Right middle | K |
| . | Right ring | L |
| / | Right pinky | ; |
B belongs to the left hand. B sits near the center of the keyboard, so many typists hit it with the right index finger. Standard touch typing assigns it to the left index finger, and learning it that way early prevents a habit that’s hard to undo later.
Move the finger, not the hand. When you reach for a bottom row key, only that finger should move. Keep your wrists steady and your other fingers resting on the home row, so every reach starts and ends in the same place.
Drill the bottom row on its own. Type short sequences such as “zxcv”, “bnm”, “vbvb” and “nmnm” slowly, without looking down. Then move on to real words that use the row, like “can”, “mix”, “zinc” and “bomb”. Increase speed only once you stop making mistakes. When the reaches feel automatic, take a short 1-minute typing test and check whether your mistake count drops.
What Is the Home Row and Why It Matters
The home row is the middle row of letter keys on your keyboard — A S D F on the left, J K L ; on the right — where your fingers rest between keystrokes. It’s called “home” because every other key you press, your finger returns here immediately afterward. This constant return is what builds the muscle memory that lets you type without looking down.
Feel for the small raised bumps on the F and J keys. They exist purely so your index fingers can find the home row by touch, without your eyes ever leaving the screen. Once your index fingers land on those bumps, the rest of your hand falls into place automatically.
- Left hand: A (pinky), S (ring), D (middle), F (index)
- Right hand: J (index), K (middle), L (ring), ; (pinky)
- Both thumbs rest on the space bar
Quick Reference: Home Row Finger Chart
Here’s the full layout at a glance before we break down each hand individually:
| Key | Finger | Hand |
| A | Pinky | Left |
| S | Ring | Left |
| D | Middle | Left |
| F | Index | Left |
| Space | Either thumb | Both |
| J | Index | Right |
| K | Middle | Right |
| L | Ring | Right |
| ; | Pinky | Right |
Left Hand Finger Placement (Full Key Assignment)
Your left hand doesn’t just cover the home row — each finger owns a full vertical zone that angles slightly upward and to the left as you move away from the home row.
| Finger | Home Key | Also Reaches |
| Pinky | A | Q, Z, 1, Tab, Caps Lock, Left Shift |
| Ring | S | W, X, 2 |
| Middle | D | E, C, 3 |
| Index | F | R, T, G, V, B, 4, 5 |
Right Hand Finger Placement (Full Key Assignment)
The right hand mirrors the left, with the pinky picking up extra work at the far edge of the keyboard, including punctuation and the Enter key.
| Finger | Home Key | Also Reaches |
| Index | J | Y, U, H, N, M, 6, 7 |
| Middle | K | I, comma, 8 |
| Ring | L | O, period, 9 |
| Pinky | ; | P, /, 0, [, ], -, =, Enter, Right Shift |
Thumb and Space Bar Position
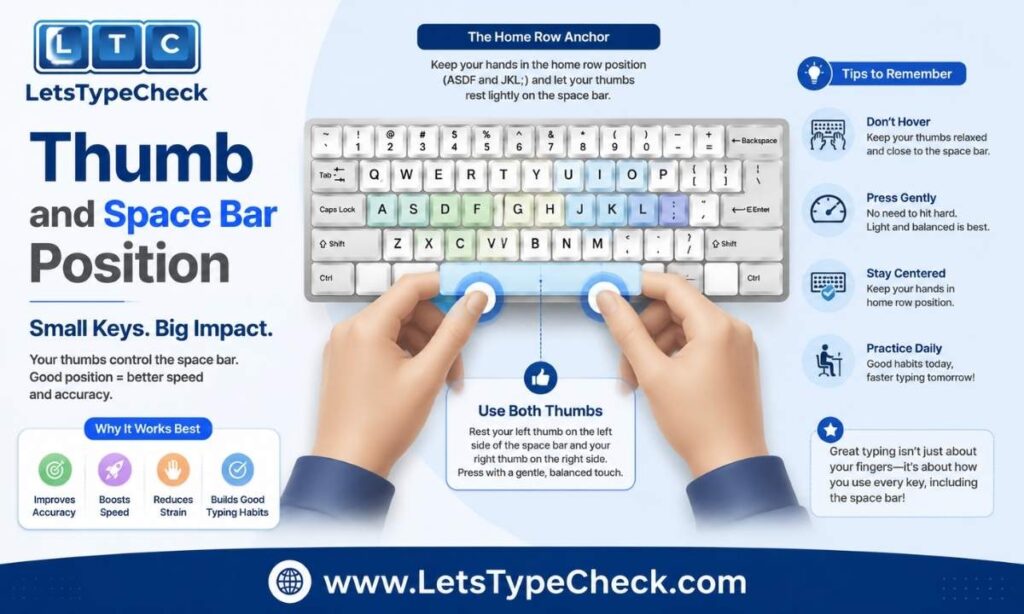
Thumbs are the one part of the hand that doesn’t get a fixed key — they hover just above the space bar and press it whenever a word ends. Most typists develop a dominant thumb for the space bar (usually whichever hand feels more natural), and that’s completely fine; there’s no rule requiring you to alternate.
- Keep your thumb relaxed and slightly curved, not stiff or flat against the bar
- Avoid pressing the space bar with both thumbs at once — it wastes movement and breaks rhythm
- Let the thumb float rather than rest its full weight on the bar between words
Numeric Keypad Home Row (4, 5, 6)
If your work involves data entry — common in bank and clerical exams — the numeric keypad has its own home row that most typing guides skip entirely. On a standard keypad, 4, 5, and 6 form the base position, with a small raised bump on the 5 key acting the same way the F and J bumps do on the main keyboard.
- Right index finger rests on 4, middle on 5, ring on 6
- The pinky handles the plus key and Enter; the thumb is free since the numpad has no space bar
- Feel for the bump on 5 to find the position without looking, exactly like F and J
Top Row and Bottom Row Finger Reach
Once home row placement feels automatic, the next step is training your fingers to stretch to the top row (Q W E R T Y U I O P) and bottom row (Z X C V B N M) and immediately return home after each reach. The finger responsible for a key doesn’t change based on row — your left index finger still handles R and V just as it handles F.
- Top row drill: qwert yuiop, repeated slowly with a full return to home row after each word
- Bottom row drill: zxcv bnm, paired with full sentences like “the quick brown fox jumps over the lazy dog” once comfortable
- Reach with the finger only — don’t shift your whole hand up or down to compensate
Common Finger Placement Mistakes
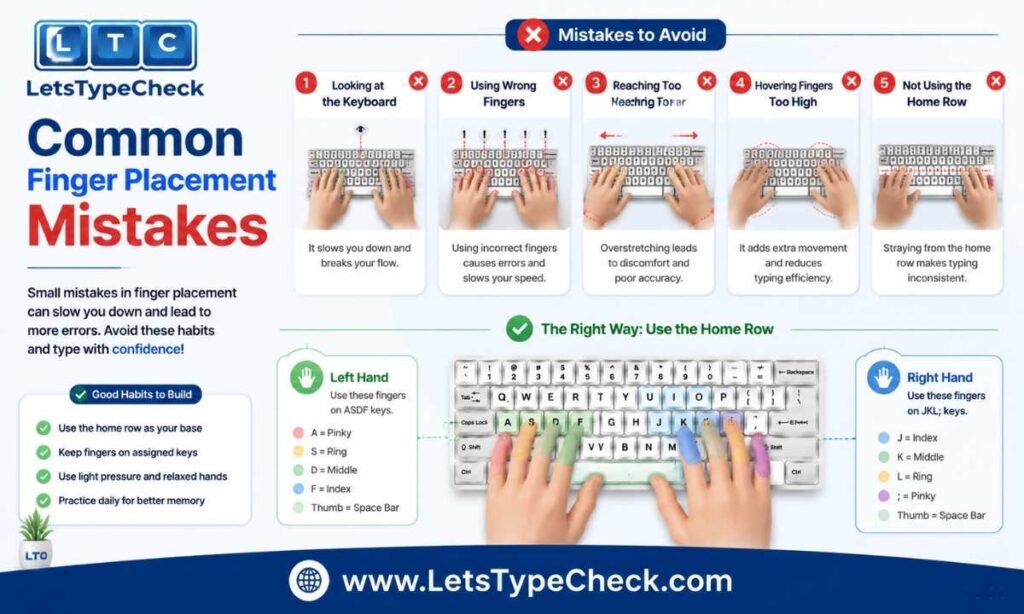
Most self-taught typists develop at least one of these habits early, and they’re far easier to fix now than after years of practice have locked them in.
- Index finger overload — using F or J for keys that belong to the middle, ring, or pinky finger because it feels faster in the moment
- G and H confusion — G belongs to the left index finger and H to the right index finger, a mix-up almost every beginner makes early on
- Floating hands — hovering above the keyboard instead of resting lightly on home row between keystrokes, which slows every return trip
- Resting wrists on the desk while actively typing — this bends the wrist and restricts finger movement, and over time contributes to strain
- Curled or flat fingers — fingers should stay gently curved, not flattened or stiff, so they can strike keys at a natural angle
- Looking down to “check” placement — even a quick glance undoes the muscle memory you’re trying to build; cover the keyboard if you have to
Home Row on Laptops and Compact Keyboards
Laptop keyboards and compact (TKL or smaller) keyboards use the same A S D F / J K L ; layout, but the keys sit closer together and often have shorter travel. The finger assignments don’t change, but two adjustments help:
- Keep your hand span slightly more compact than you would on a full-size desktop keyboard, since the key spacing is tighter
- On keyboards without a numeric keypad, the numbers along the top row are reached the same way as any top-row key — there’s no separate number-pad home row to worry about
- The F and J bumps are usually smaller on laptop keys, so it can take a few extra days to build reliable touch-recognition
Home Row on Alternative Layouts (Dvorak, Colemak)
If you’ve heard of Dvorak or Colemak, both are alternative keyboard layouts built around a different home row designed to reduce finger travel. Dvorak places A O E U on the left home row and H T N S on the right; Colemak keeps A R S T D on the left while rearranging several other keys. Both claim efficiency gains over QWERTY, but switching means relearning finger placement from scratch and losing muscle memory on every other keyboard you touch — including exam center computers, which run QWERTY by default. For anyone typing for work, school, or exams, QWERTY’s home row remains the practical choice.
Why Finger Placement Matters for Government Exam Typing Tests
For SSC, CPCT, and RRB typing exams, finger placement isn’t just a speed issue — it’s an accuracy issue, and accuracy is what these exams actually score. Most government typing tests apply a mistake penalty per error rather than judging on raw WPM alone, so a fast typist with sloppy finger habits often scores worse than a moderate typist with clean technique.
- Wrong-finger habits produce the same handful of errors repeatedly — usually around G, H, B, and Y — which compounds under exam time pressure
- Exam software typically doesn’t allow backspacing without a penalty, so accuracy built through correct finger placement matters more than it does in casual typing
- Practicing on the exact keyboard layout and finger assignments used in this guide transfers directly to exam center computers, which run standard QWERTY
For more on how these exams are scored, see our guide to what is a good typing speed for job- and exam-specific benchmarks.
7-Day Practice Plan to Build Home Row Muscle Memory
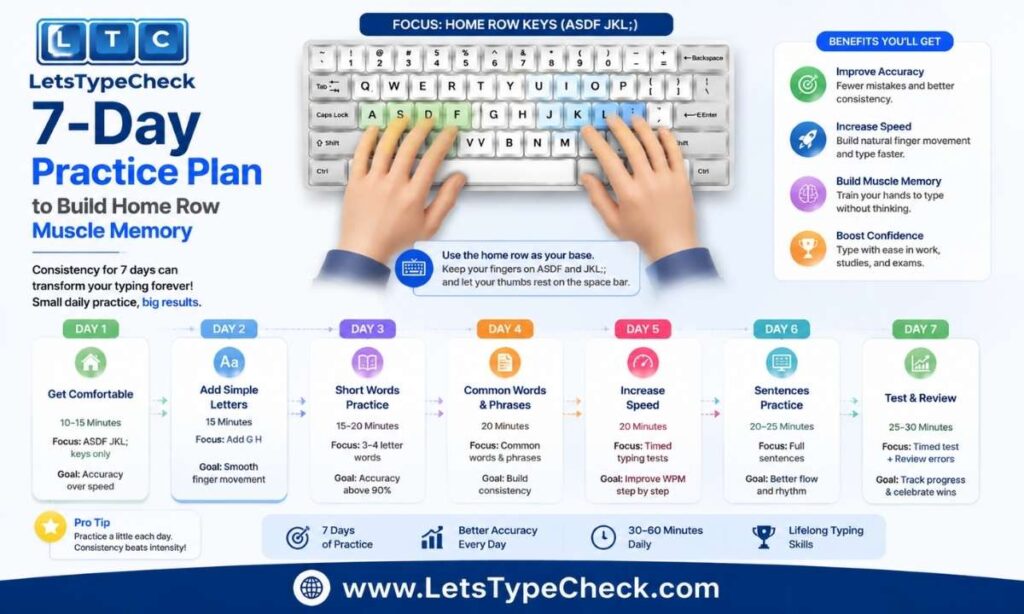
This plan builds outward from the home row in layers, so each day reinforces the day before instead of introducing everything at once.
- Day 1–2: Home row only. Type asdf jkl; and fdsa ;lkj repeatedly, along with short home-row words like “ask,” “flask,” and “glass.” Speed doesn’t matter yet — every keystroke should use the correct finger.
- Day 3–4: Add the top row. Practice qwert yuiop, then reach up from home row and return after every keystroke. Words like “type,” “quiet,” and “tower” work well here.
- Day 5–6: Add the bottom row. Practice zxcv bnm, then move into full sentences that mix all three rows, such as “the quick brown fox jumps over the lazy dog.”
- Day 7: Take a full typing test with no warm-up to measure where you’ve landed, then repeat any day that still feels shaky before moving on.
Finger Strength and Flexibility Exercises
A few minutes of dedicated finger exercises, separate from typing practice, can speed up how quickly correct placement becomes automatic — especially for the pinky, which does more work than most beginners expect.
- Finger lifts: rest all fingers on the home row, then lift and lower each finger individually 10 times while keeping the others still
- Pinky strengthener: repeat “aq aq aq zq zq zq” using only the pinky and ring fingers, since these are usually the weakest and slowest to develop accuracy
- Stretch breaks: gently extend and flex your fingers every 20–30 minutes during long practice or exam-prep sessions to reduce fatigue.
How to Check Your Finger Placement (Self-Test)
The fastest way to know if your placement has actually improved is to test it under light pressure rather than guessing. Run a short session on our typing test, starting with Easy mode, and pay attention to which keys trip you up rather than only your final WPM.
- If mistakes cluster around specific letters, that’s usually a sign the wrong finger is covering that key — cross-check it against the charts above
- If your WPM in Easy mode already tops 40 with 95%+ accuracy, your placement is solid — see our how to type faster guide for the next stage
- If you’re just starting out, our typing test for beginners guide walks through which mode and duration to use first
FAQs
What is the correct finger placement for typing?
Left hand: A (pinky), S (ring), D (middle), F (index). Right hand: J (index), K (middle), L (ring), ; (pinky), with both thumbs on the space bar.
How long does it take to learn proper finger placement?
Most beginners build reliable muscle memory in 2 to 3 weeks with 15 to 20 minutes of focused daily practice, though a full transition from bad habits can take 4 to 6 weeks.
Do I need to move my whole hand to reach other keys?
No — only the finger responsible for that key should move. Your hand stays anchored over the home row while individual fingers stretch and return.
What if my hands are too small or too large for standard key spacing?
The same finger assignments still apply; smaller or larger hands simply need a bit more practice time to build accurate reach distances, and a slightly more compact or relaxed hand position can help.
Does home row finger placement apply to phone or tablet typing?
Not directly — touchscreen typing relies on thumb-typing or tap accuracy rather than a fixed home row, though the underlying QWERTY key layout stays the same.